
During the holiday season, I love baking and giving bread to my friends and family as presents. Most of the time, I place the bread on a disposable plate or sealed in a Ziploc bag. But few things look as unappetizing as lumpy loaf of bread wrapped in plastic wrap. This year I want to make my bread look as good as it tastes. To do that, I’ll have to properly wrap bread for gifting.
I know bread loaves come in all sorts of shapes and sizes. Some breads come with nuts, seeds, or sugary toppings that make them difficult to wrap like a present. Additionally, Christmas wrapping paper tends to be ultra thin. You can’t count on it to protect a delicate crust or keep your loaf from drying out.
If you want to wrap bread for gifting, take the inexpensive, yet gorgeously rustic approach: parchment paper.
Here’s What You’ll Need
I’m not an expert crafter. I don’t know how to tie beautiful bows with ribbon or perfectly crease wrapping paper so every edge lines up. If you have that ability, by all means, work with what you got! But if you’re like me and want to keep things simple, all you’ll need is the following:
- A Loaf of Bread
- Some Plastic or Saran Wrap
- A Pair of Scissors
- Parchment Paper
- Twine
One of the great things about the way I wrap bread is that it doesn’t require a single piece of tape. Tape doesn’t stick well to parchment paper, so I let the twine do the work.
Instructions
Have everything you need? Great! Let’s get started.
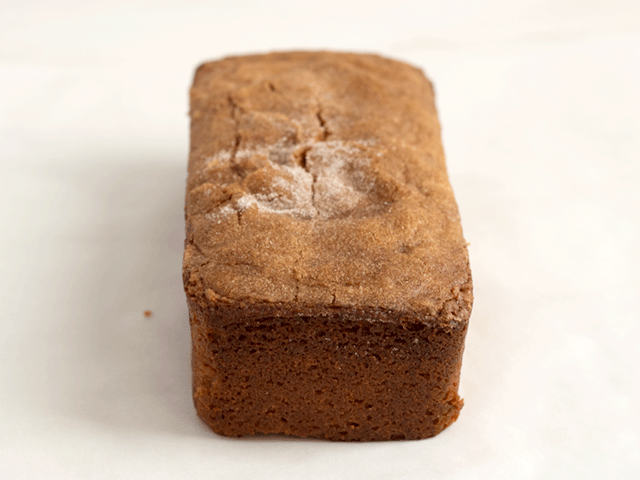
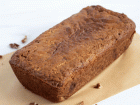
First, you’ll need a loaf of bread, preferably one that was made fresh today but has had adequate time to cool before wrapping. Pictured below is a loaf of Amish friendship cinnamon bread, which is one of my favorite dessert quick breads to give away.
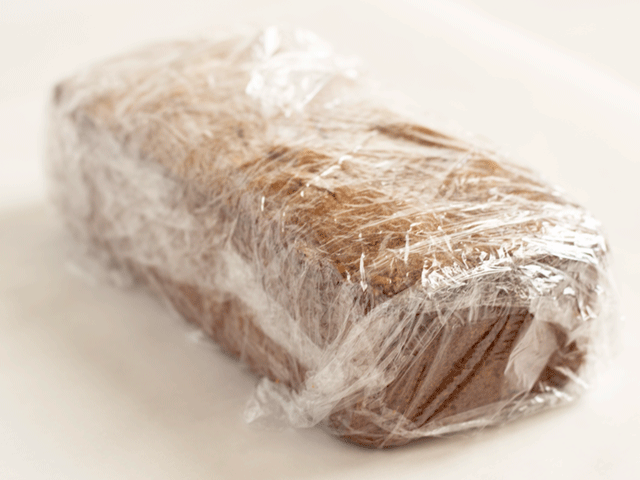
Step 1: Wrap in Plastic Wrap
Now I’m typically not a fan of smothering a loaf in cling wrap. It doesn’t look pretty, and it can be a bit of a hassle to deal with plastic that keeps sticking to itself or smooshing around the edges. However, this particular loaf has a thin layer of cinnamon sugar on top. All that lovely topping will brush off during the wrapping process if it doesn’t have something to trap it against the crust.
Fortunately, you don’t need the saran wrap to look pretty. It simply needs to keep everything protected and sanitary, so feel free to wrap your loaf with however much plastic wrap it needs to stay covered in whatever method feels right to you.
If you’re a perfectionist, I’m sure you can make your loaf look better than mine at this stage, but here’s a look at the first step of wrapping our bread.
Step 2: Wrap in Parchment Paper
Next, place your loaf on a sheet of parchment paper. You want your parchment paper to be about two or three inches longer than your loaf, and it should be wide enough to cover the sides and top of your bread with a few inches to spare.
Grab the wide edges of your parchment paper and match them up. Half fold, half roll the parchment edges together and down until it reaches the top of your bread. Parchment paper can be a bit finicky, so it’s okay if it doesn’t lay quite flat.
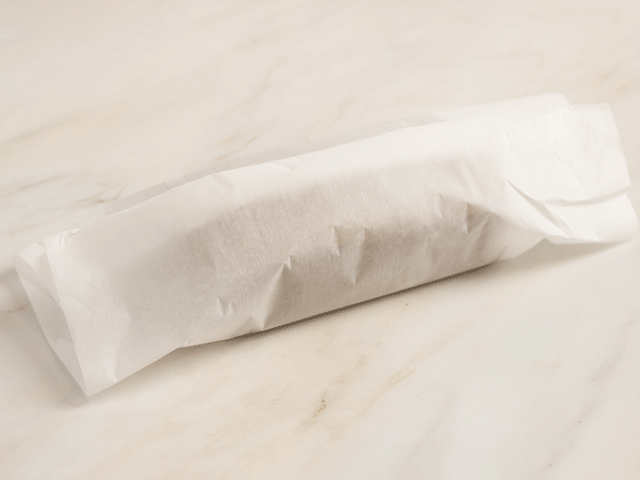
Next, flip your loaf so the folded seam is on the bottom. The weight of the bread should keep the fold from popping open while you work with the opposite edges.
Fold each corner of the parchment paper inward so each side has a triangular tip. Again, you don’t have to be perfect at this stage because parchment paper is finicky and doesn’t bend in the same way that thin holiday wrapping paper does. It will still look nice when you’re finished, I promise.
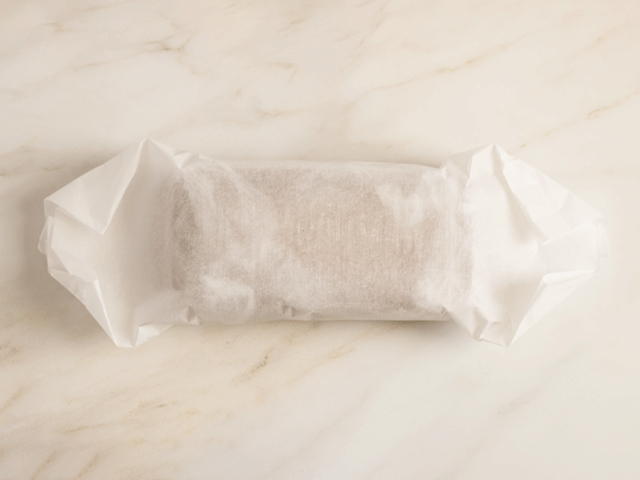
Next, you will half fold and half roll those triangular corners toward your bread. The parchment paper will want to spring back from its spot, and creasing the paper can help keep things together. But even it you can’t keep your paper from snapping back to its original position, the next step will help compensate for any problems you had with the parchment.
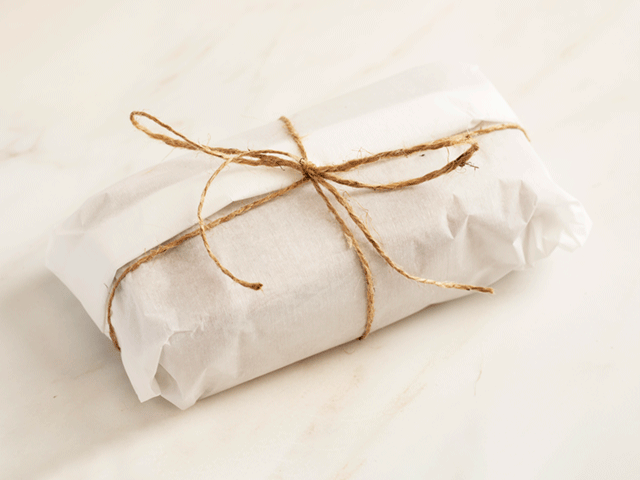
Step 3: Tie With Twine
With your loaf still seam-side down and the edges folded (more or less) inward, place your bread on a length of twine. The twine will need to be long enough to wrap around the short side and the long side of your bread with several inches left over to tie a bow.
Although it doesn’t particularly matter which direction you start, I prefer to set my bread perpendicular to the twine so the loaf sits horizontally and the string sits vertically. Cross the ends of the twine so they make an X.

Next, guide your twine to the opposite ends of the loaf. Each side of the twine will be what holds the folded parchment paper close to the edges of the bread.
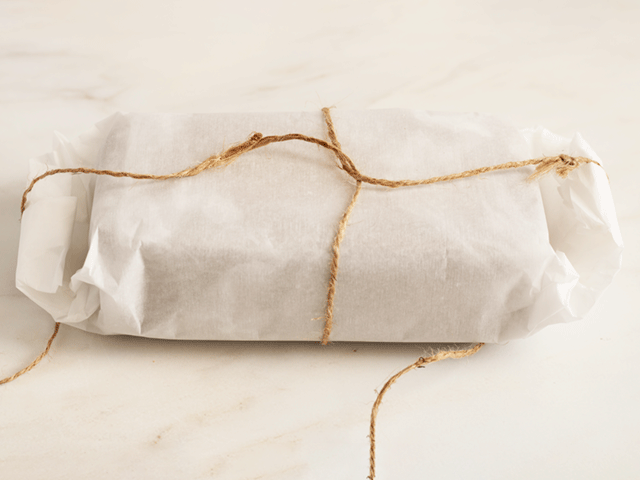
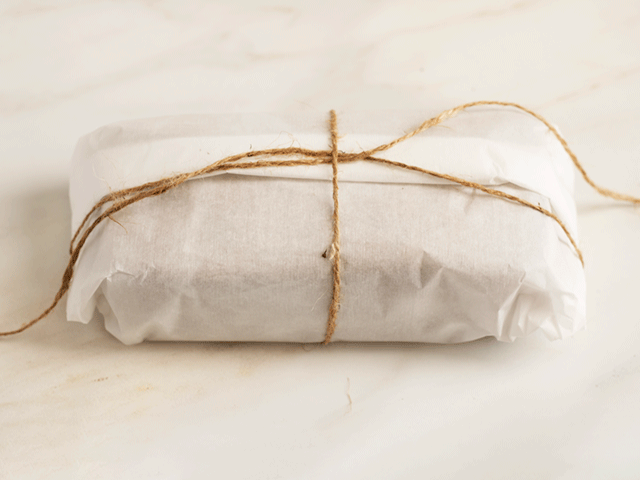
Carefully flip your bread back over, so it’s right side up. At this stage, you’ll have a nice cross on the bottom of your bread, and you’ll have your two ends ready to wrap up and over the edges of your bread. To better secure my wrapping, I slide each piece of twine under loop in the middle. Tucking the loops under also makes it easier to tie the string into a bow.
If you’re thinking about adding a tag, I would slide the tag onto one of the ends at this stage in the wrapping so the bow keeps the tag in place.
And from here, I tie the edges of my twine into a bow.
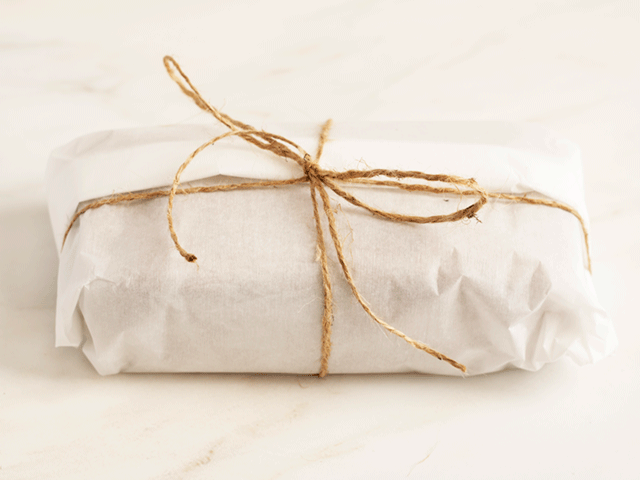
At this point, you’re pretty much done with your loaf. I like to adjust my bow so the loops are even, and then I trim the end pieces so they’re even too.
Enjoy Your Holidays!
I hope my tutorial on how to wrap bread for gifting was helpful for you. I love wrapping bread this way because it looks pretty and rustic at the same time. The parchment paper protects the bread more effectively than regular wrapping paper, and the inner cling wrap will keep your loaf from drying out during delivery.
I know I’m not the best gift wrapper, however. If you have tips for improvement, I’d love to hear them. Perhaps you like to slide a little extra wrapping paper around the parchment paper for a bit of color, or maybe you prefer to use premade paper bread bags so your loaf looks like it came from a bakery. No matter your preference, please share your feedback in the comment section below. Your tips and pointers could help make someone’s holiday a little brighter.
Just a quick note: I am an Amazon associate, so I do earn money from qualified purchases. I recommend products based on what regularly use and enjoy, however, and my opinions are my own.

This is one of the best guides I have had the pleasure of reading and following! Thank you so much for these easy to follow instructions. The photos help at every stage of the process. Well done!
Thank you so much for the kind feedback. You’ve made my day!
I am baking some bread for my very good friend and her family today and I had no idea on how to gift her the bread. Thanks to you I will be able to wrap it oh so pretty today! Yay!!! Thanks so much! Blessings.
You’re welcome! Thank you for the kind words.
Thanks so much for these instructions! I have been struggling with how to wrap fresh baked bread and it stay wrapped. I never thought of using twine.
You’re welcome! I’m glad it worked for you. Ribbon also works well too – just whatever you have on hand that looks pretty..