
In the past, I was scared to try any bread recipe that took longer 2 or 3 hours. Recipes that involved a starter I often dismissed outright. After all, why would I want to wait an entire week to enjoy bread when I could throw together an acceptable loaf in an afternoon?
Furthermore, I didn’t want to deal with the hassle of maintaining a starter. Growing one seemed like adopting a pet. I’d have to feed it, water it, and keep it active. If the temperature got too low, the yeast wouldn’t grow quickly. If the temperature got too hot, the yeast would grow too much or die entirely.
But my bread adventures, or breadventures if you will, have given me a little more confidence and perhaps a little more patience. My husband and I love a good sourdough loaf from time to time, so I scouted around for a good recipe.
Most recipes recommended using wild yeast starter rather than dry active yeast (commercial yeast), and here’s what I learned.
What Is Wild Yeast?
Commercial yeast consists of a sugar-eating fungus Saccharomyces Cerevisiae. This fungus breaks down the sugars in flour, and then the fungus excretes carbon dioxide. The carbon dioxide gas creates bubbles that push against the bread dough, causing it to rise. This yeast works well for cranking out bread quickly, making it a profitable option for large-scale bakeries.
A wild yeast starter consists of a similar fungus, Candida milleri, as well as a mix of bacteria, Lactobacillus. This yeast requires a longer fermentation time to achieve the same rising effect as commercial yeast. But the extended time allows for more efficient breakdown of the amino acids in the flour, resulting in more digestible bread. A wild yeast starter also offers a more complex flavor and a chewier texture.
Wild yeast lives almost everywhere: in the air, on the kitchen counter, and in a bag of flour. But to be useful in baking, wild yeast needs a medium to keep it alive and growing. When you make a starter, you can harvest the wild yeast already in your home to create beautiful, flavorful breads.
What You’ll Need
Some sourdough recipes will call for fruits, sugars, and similar ingredients to start the fermentation process. However, these starters often require additional fermentation time to allow the yeast and bacteria to achieve the right balance. For this wild yeast starter, you won’t need much at all, just a little all-purpose flour, water, and time.
But here are a few other items you might want to have on hand when you begin:
- Scale*
- 2-Quart Glass Bowl or Plastic Container
- Plastic Wrap or Kitchen Towel
If you don’t own a scale, you can use measuring cups. But keep in mind that measuring cups are less precise, and if you use the wrong ratio, it could affect your starter’s growth.
I recommend a digital scale for accuracy, and I shared a link to a highly rated one on Amazon. As an Amazon associate, I do earn a small commission for purchases from affiliate links, and that commission helps keep my site running. However, you don’t have to feel obligated to buy online. Many stores offer similar products for similar prices, so feel free to shop around.
Day 1
Day 1 sets the stage for your wild yeast starter. Fortunately, the first step doesn’t take much effort. Simply measure 4 oz. of flour (3/4 cup + 2 tablespoons) and 4 oz. water (1/2 cup).
Stir them together in a large bowl or plastic container. The batter will look sticky and thick, and it may loosely resemble pancake batter.
Scrape down the sides of the bowl, and then cover with plastic wrap (or a kitchen towel secured with string or a rubber band). Place your starter in a part of your kitchen that has a consistent temperature, between 70 degrees and 75 degrees Fahrenheit. I keep my starter in the corner on my kitchen counter, but you could keep it on top of the fridge or some other place where it won’t be disturbed.
That’s it! Let your starter sit for 24 hours so it can work its magic.
Day 2
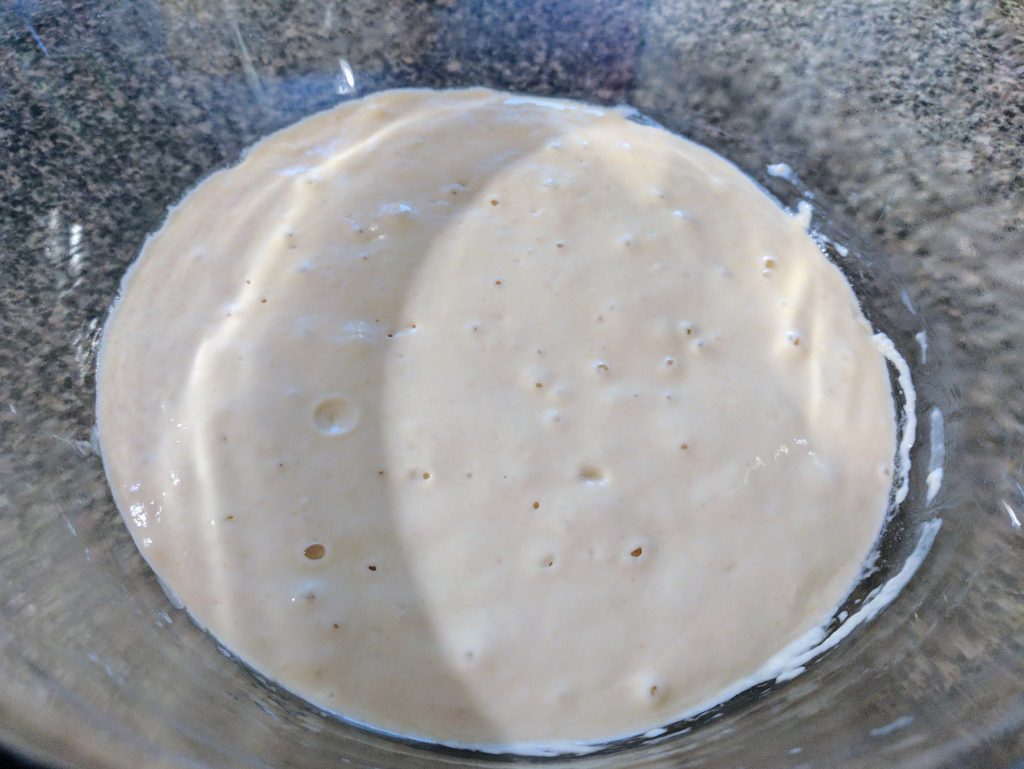
Day 2 is pretty much the same as day 1. By now, your sourdough may look something like the picture below.
If you’re lucky, you might already see a few bubbles in your batter. These bubbles are a sign that your yeast is active. The bacteria and fungus have already broken down some of the sugars in the flour and have released carbon dioxide into your batter.
Go ahead and take a sniff of your starter. It might smell fresh, slightly sweet, and perhaps a little yeasty.
If you don’t see any bubbles yet, don’t worry. Your yeast may need a little longer to get going. As you can see with my starter, I had 3 little bubbles that looked more like dimples than bubbles.
Now that you’ve inspected your starter, it’s time to feed and water it. Like Day 1, you’ll want to measure 4 oz. of water with 4 oz. of flour. Stir them vigorously together until the batter becomes smooth, sticky, and thick.
Cover your starter and let it sit for another 24 hours.
Day 3
Day 3 will be a lot like days 1 and 2. You’ll still need to feed and water it, but you might see some more action in your starter by now.
By day 3, you should see a few more bubbles as the yeast continues to break down sugars and release carbon dioxide. Additionally, the yeast will release a little bit of alcohol that will raise the acidity of your starter and keep out other harmful bacteria. Your yeast should look visibly larger, and it will smell more sour than sweet.
To keep your growing starter happy, measure another 4 oz. of water and 4 oz. of flour. Stir them together until the batter becomes smooth again. As you stir, you may hear a few bubbles popping, and the batter may emit a musty odor.
Scrape down the sides of the bowl, cover, and let sit for another 24 hours.
Day 4
By now you’ve pretty much got the hang of maintaining your starter. Just measure, stir, cover, and repeat.
By day 4, your starter should have lots more bubbles, and it should look noticeably bigger in size (especially when compared to days 1 and 2). At this point, your starter will definitely smell sour, and the pungent aroma may make you second guess your desire to maintain a starter.
But don’t give up! Your starter is almost ready for baking.
As usual, measure 4 oz. of water and 4 oz. of flour. Stir until all the flour has been incorporated. The batter should feel a little looser than day 3, although it will still be quite thick. If you were to pull away the spoon, some of the starter will likely stick to it in a messy string.
Scrape down the sides, cover your starter, and let it sit for another 24 hours.
Day 5
Congratulations! You made it to day 5! Your starter should be ready to use, or at least almost ready to use.

As you can see, my starter is honeycombed with bubbles, though there are a few sections where you might not see any activity. Your starter might have more bubbles, and it may even look a bit frothy at this stage. When you stir the starter, it will feel looser than on day 4, and it will smell even more pungent.
Feeling adventurous?
Taste your starter! It will taste sour and mildly of vinegar.
If your starter isn’t quite to this point, don’t worry. You can continue to feed it the usual 4 oz. of flour and 4 oz. of water and let it sit for another 24 hours while covered.
What Happens Next?
On day 5, I didn’t have time to use my wild yeast starter, and I knew that an extra day would only mature my starter even more. I let it sit, and here’s what I had by day 6.
A lot more bubbles and volume!
At this point, I used my starter to bake two lovely loaves of sourdough bread. If you’re ready to bake, check out the sourdough sandwich bread recipe on my next post.
Not quite ready to bake? Keep feeding your starter 4 oz. of flour and 4 oz. of water daily. When you have more starter than you want to deal with, you can use it to bake or you can discard it.
Have Additional Questions?
I love the flavor my wild yeast starter added to my first loaf of sourdough bread, and I’m happy my starter came together the first time. However, I know wild yeast starters can be tricky to get right, so understandably, you may have a few questions about getting your starter going. If you do have questions, feel free to check out my post on maintaining and troubleshooting sourdough starters.
I know of people who put their starter in the fridge and use it feeding it when they use it, or alternatively feeding it once a month to keep it going. The colder temperature slows down the metabolism of the yeast so it doesn’t require feeding as often.
That does work for a lot of people! It’s a good method if you really understand how your starter responds to different temperatures. If you’re just starting out, you might want to make sure you let your starter reach room temperature for feedings and for baking before putting it back in the fridge.
Why cover the starter when you want wild yeasts to land on it?
There’s already wild yeast in the flour. And starters need to stay moist to encourage healthy bacteria growth. If you leave the starter uncovered, it will dry out.
You are not removing some of the starter daily when you feed it?
You don’t have to! This is the method I’ve been using to make starters for years, and it works great. I know many bakers do recommend removing some, and you can if you want to. By removing some of the starter, you ensure the remaining starter has plenty of food to get active and bubbly. But since this technique starts small and grows over time, you don’t have to worry about discard for a little while.
What if my starter starts to separate? I’m on day four.
That’s a good question! Whenever you feed your starter, just make you stir it thoroughly. If it seems especially watery, your starter might be hungry, and an extra tablespoon of flour on top of the usual feeding can help even things out.